Bluesky has quietly become one of the fastest-growing corners of the social web, and if you publish on WordPress, it is a channel you do not want to ignore. The problem? Copy-pasting every new blog post into yet another network eats up time you would rather spend writing.
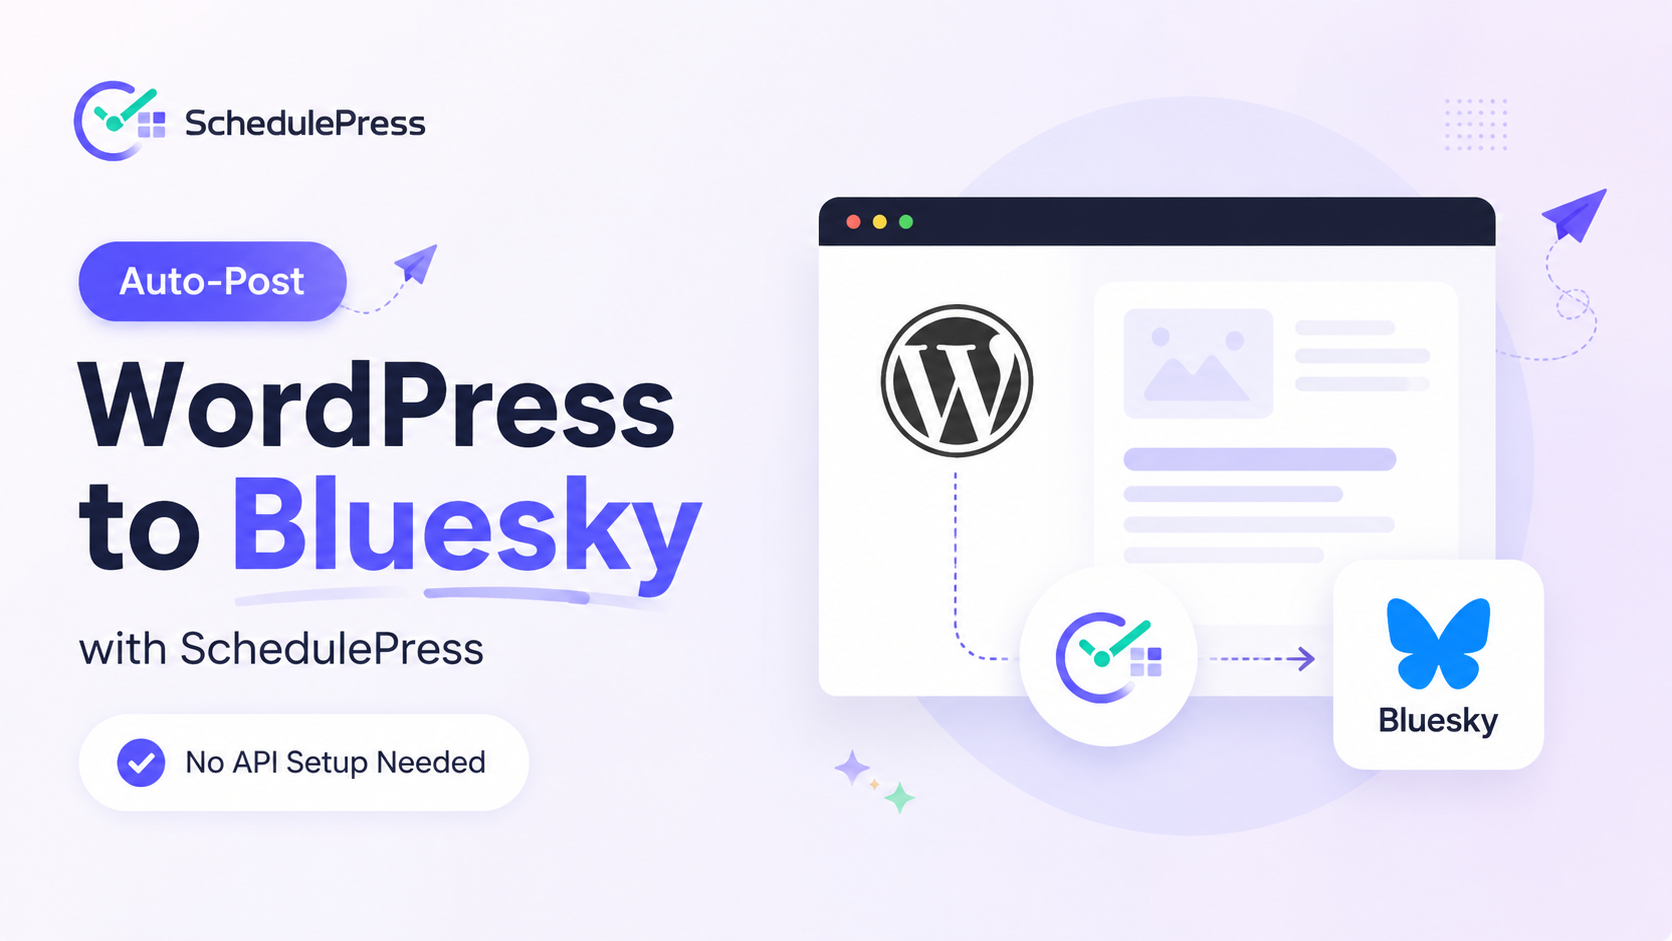
That’s exactly the friction SchedulePress removes by bringing auto-post WordPress to Bluesky the moment a post goes live: no manual sharing, no developer app, no OAuth maze. Connect your account once and every scheduled post lands on your Bluesky timeline automatically, complete with your title, link, hashtags and featured image.
In this guide, you will learn why Bluesky belongs in your distribution mix and exactly how to connect Bluesky to WordPress using SchedulePress.
Why Auto-Post to Bluesky from WordPress?
Manually sharing links works when you publish once a week. It falls apart the moment you are running a real content calendar. Here is what automating the WordPress-to-Bluesky flow gets you:
- Consistency without the busywork. Every post reaches your Bluesky followers the second it is published or on a schedule you set, so your profile never goes quiet.
- More referral traffic. Each new post becomes another doorway to bring your Bluesky audience back to your website.
- A presence on a growing network. Getting active on Bluesky early means building an audience while the platform is still growing fast.
- Zero context-switching. You stay inside the WordPress editor instead of logging into a separate dashboard for every share.
The goal is not just to be on Bluesky; it is to be there consistently without adding a single task to your day.
What Makes SchedulePress Different: No Developer App Required
Connecting social accounts can sometimes involve developer apps, API keys, OAuth settings and other technical steps. SchedulePress keeps the Bluesky setup much simpler.
To connect Bluesky to WordPress with SchedulePress, all you need is:
- Your Bluesky handle (like name.bsky.social)
- An App Password — a limited, revocable credential that never exposes your main login
That is it. This is one of the simplest social integrations in the entire plugin, which makes SchedulePress an ideal Bluesky auto poster for WordPress even if you have never touched an API in your life.
Good to know: Bluesky is available in both the Free and Pro versions of SchedulePress. The Free version connects one profile per network, while SchedulePress Pro unlocks unlimited profiles — so you can post to multiple Bluesky accounts at once.
How to Connect Bluesky to WordPress with SchedulePress
The entire process of connecting Bluesky with SchedulePress is super easy. All you have to do is follow a few steps to set up your automatic posting.
Step 1: Create an App Password in Bluesky
Log in to your Bluesky account and go to Settings → Privacy and Security → App Passwords. Click Add App Password, give it a recognizable name such as SchedulePress and confirm.
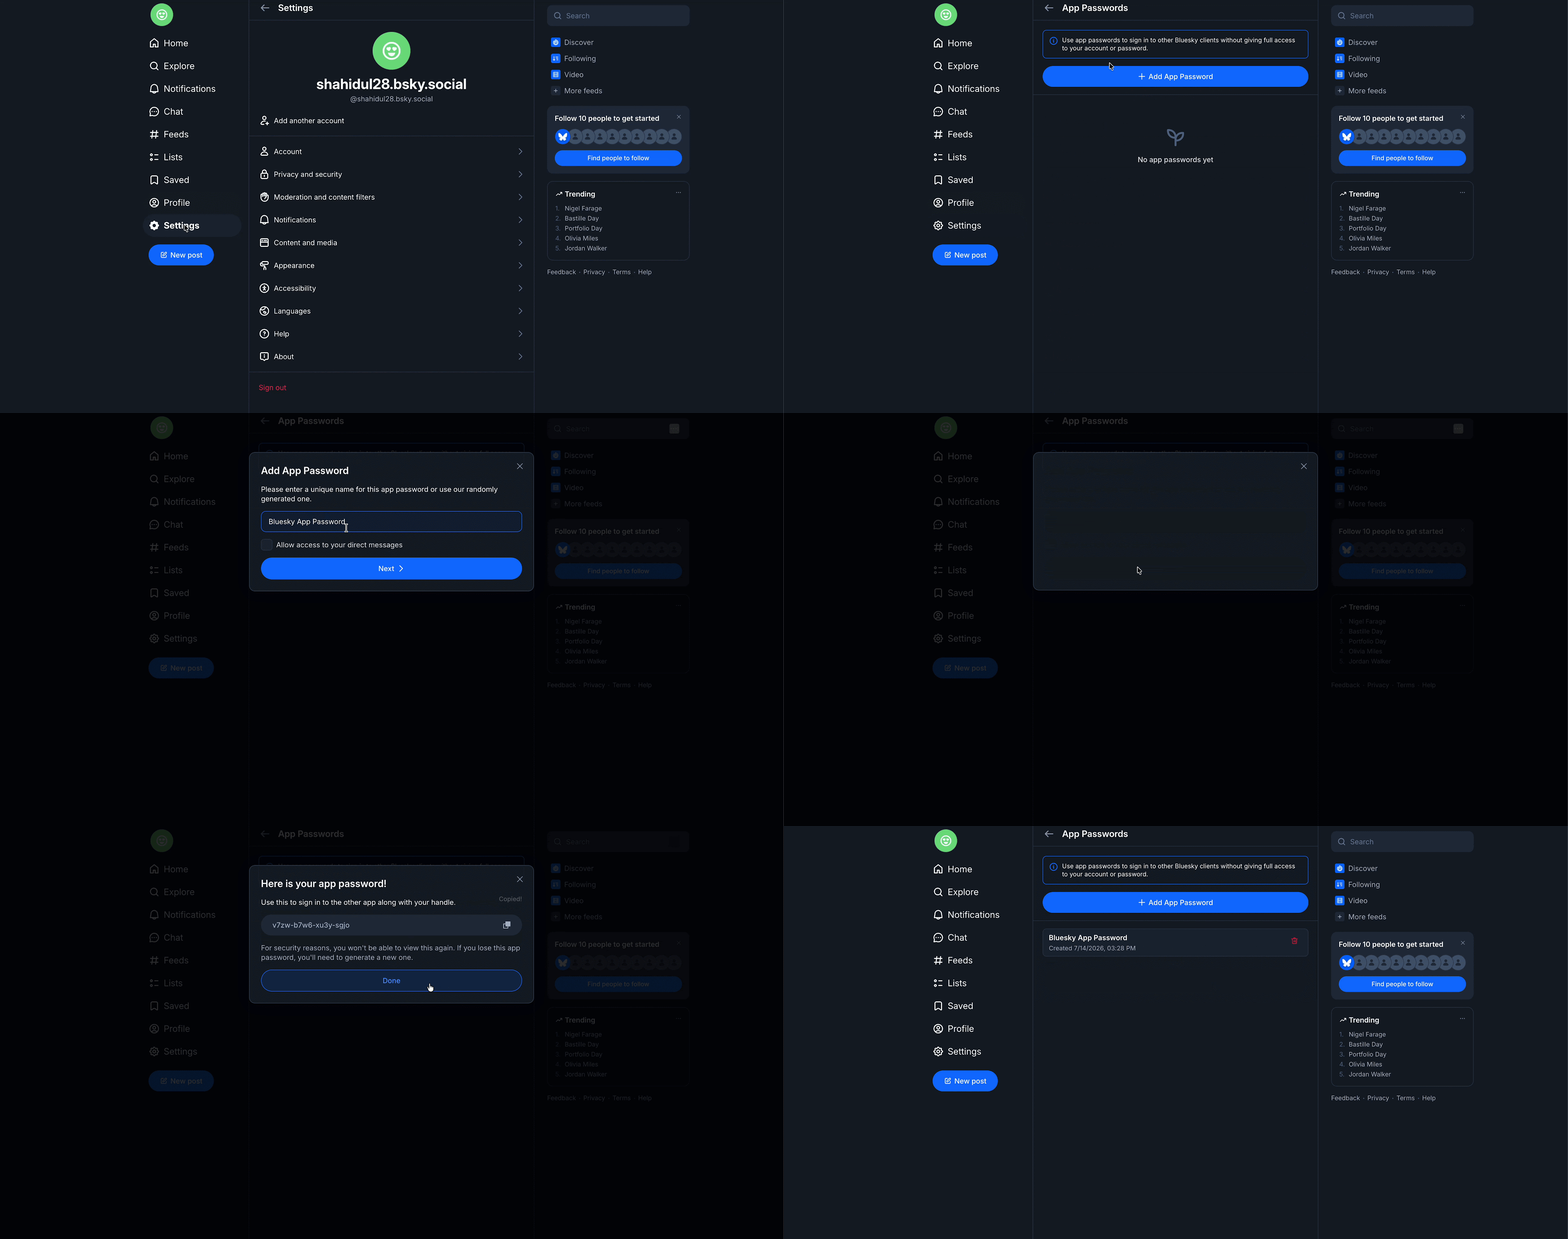
Bluesky generates a password in the xxxx-xxxx-xxxx-xxxx format. Copy it immediately; it is shown to you only once. Because it is an App Password rather than your real login, you can revoke it anytime without changing your main credentials.
Note: Never share your Bluesky App Password publicly or use your main Bluesky account password in SchedulePress.
Step 2: Open SchedulePress Settings
In your WordPress dashboard, go to wp-admin → SchedulePress → Settings. Open the Social Profile tab and scroll to the Bluesky option.
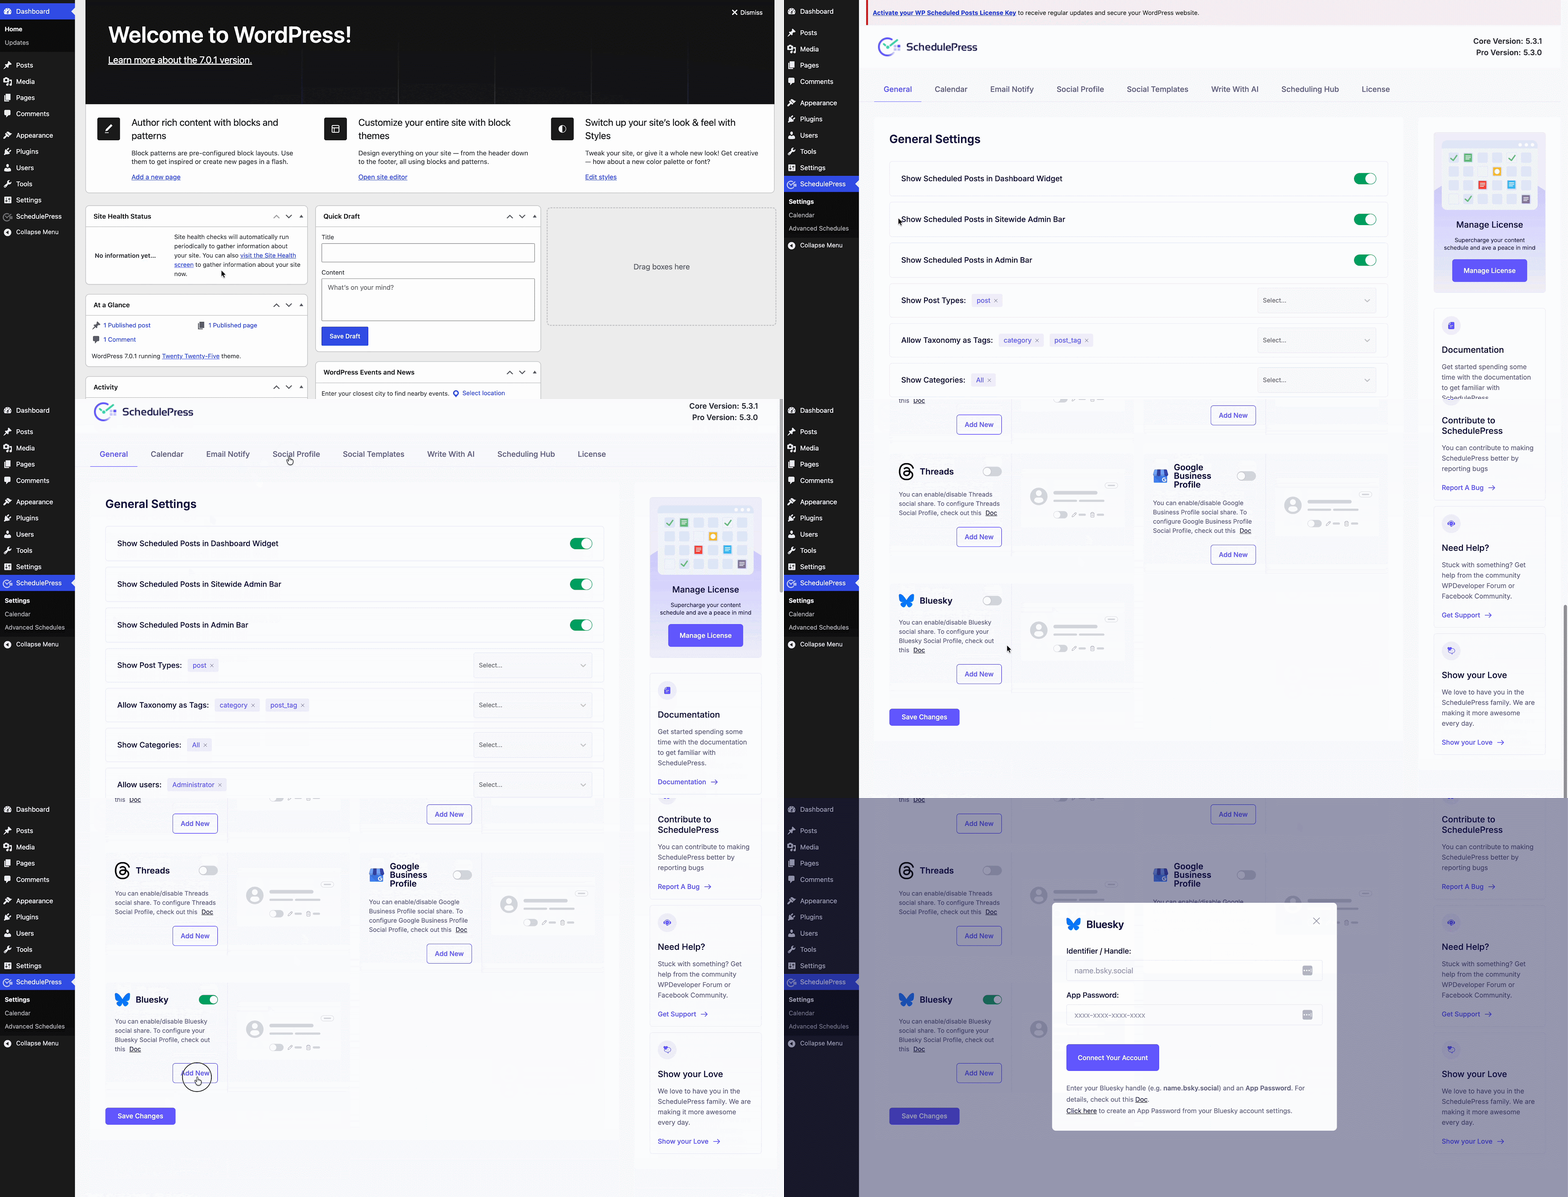
Toggle the Bluesky network on, then click Add New. A pop-up window opens where you will connect your account.
Step 3: Enter Your Handle And App Password
In the connect window, you will see two fields:
- Identifier / Handle — enter your full Bluesky handle, e.g. name.bsky.social
- App Password — paste the password you copied in Step 1
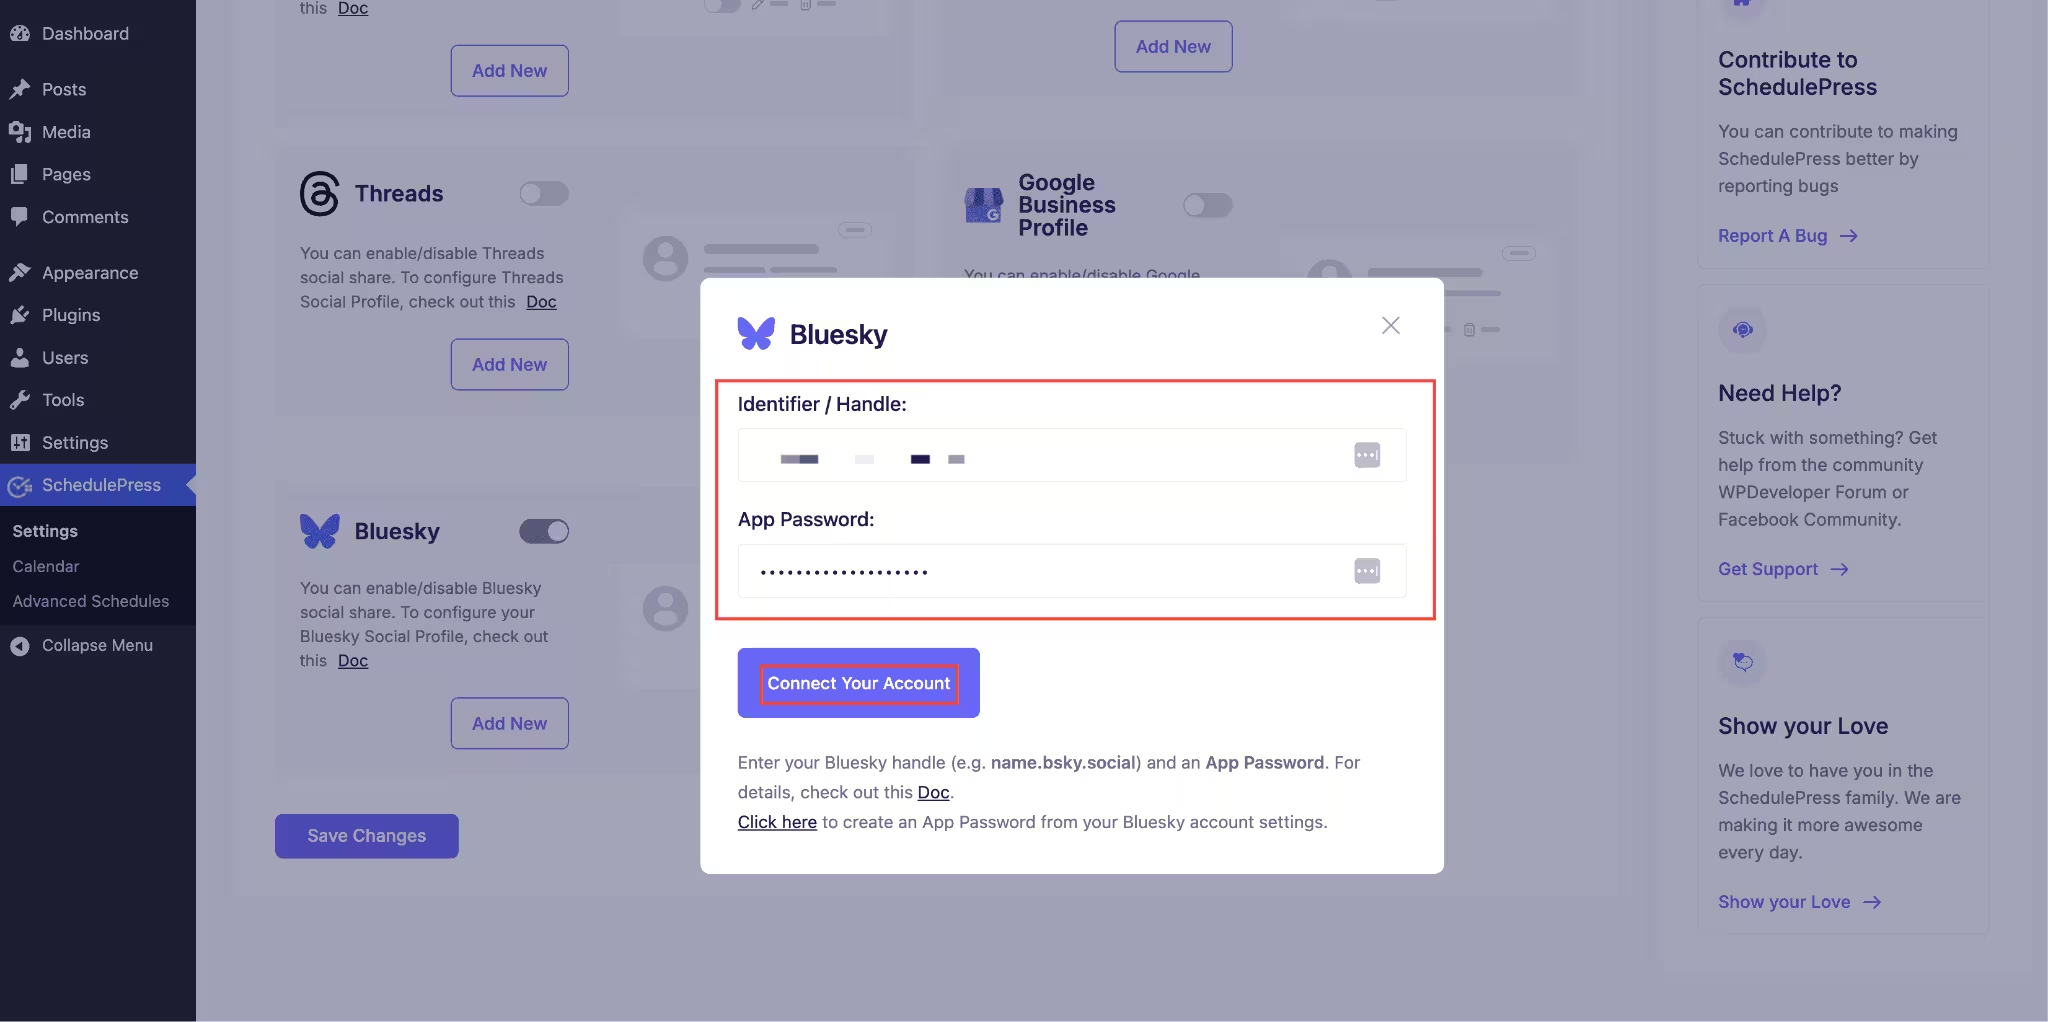
Click Connect Your Account. Have you not made an App Password yet? Use the Click here link in the same window to jump straight to the Bluesky App Passwords page.
Step 4: Enable the Profile and Save
Within moments, your Bluesky profile appears as a connected card in the Social Profile tab, tagged PROFILE.
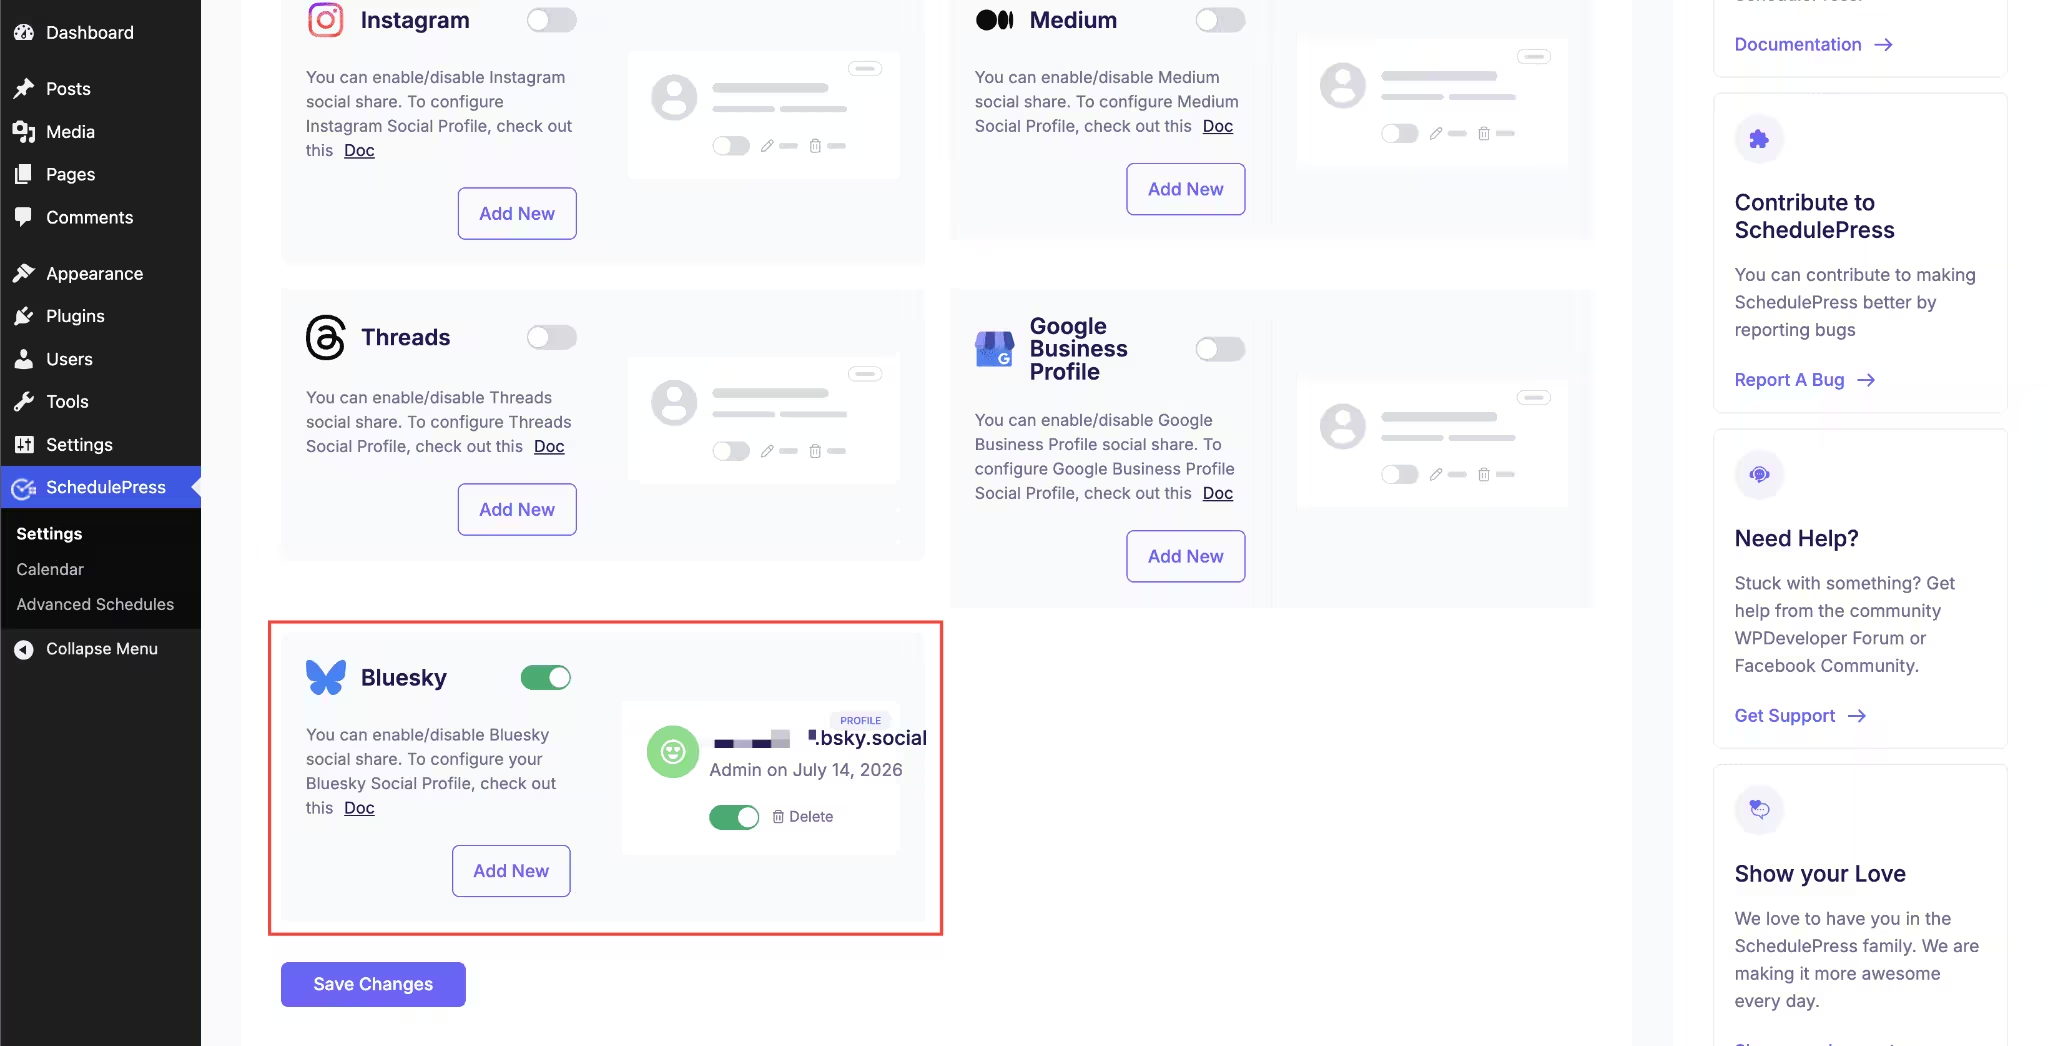
Make sure both toggles are switched on: the network toggle on the Bluesky card and the profile toggle on your connected account. Then click Save Changes. Repeat these steps to connect additional Bluesky profiles (available with Pro).
Step 5: Customize Your Post Template
Head to the Social Templates menu. Here you can configure options like Add Category as tags, Content Source, Status Template Settings, Status Limit and How often to share a post.
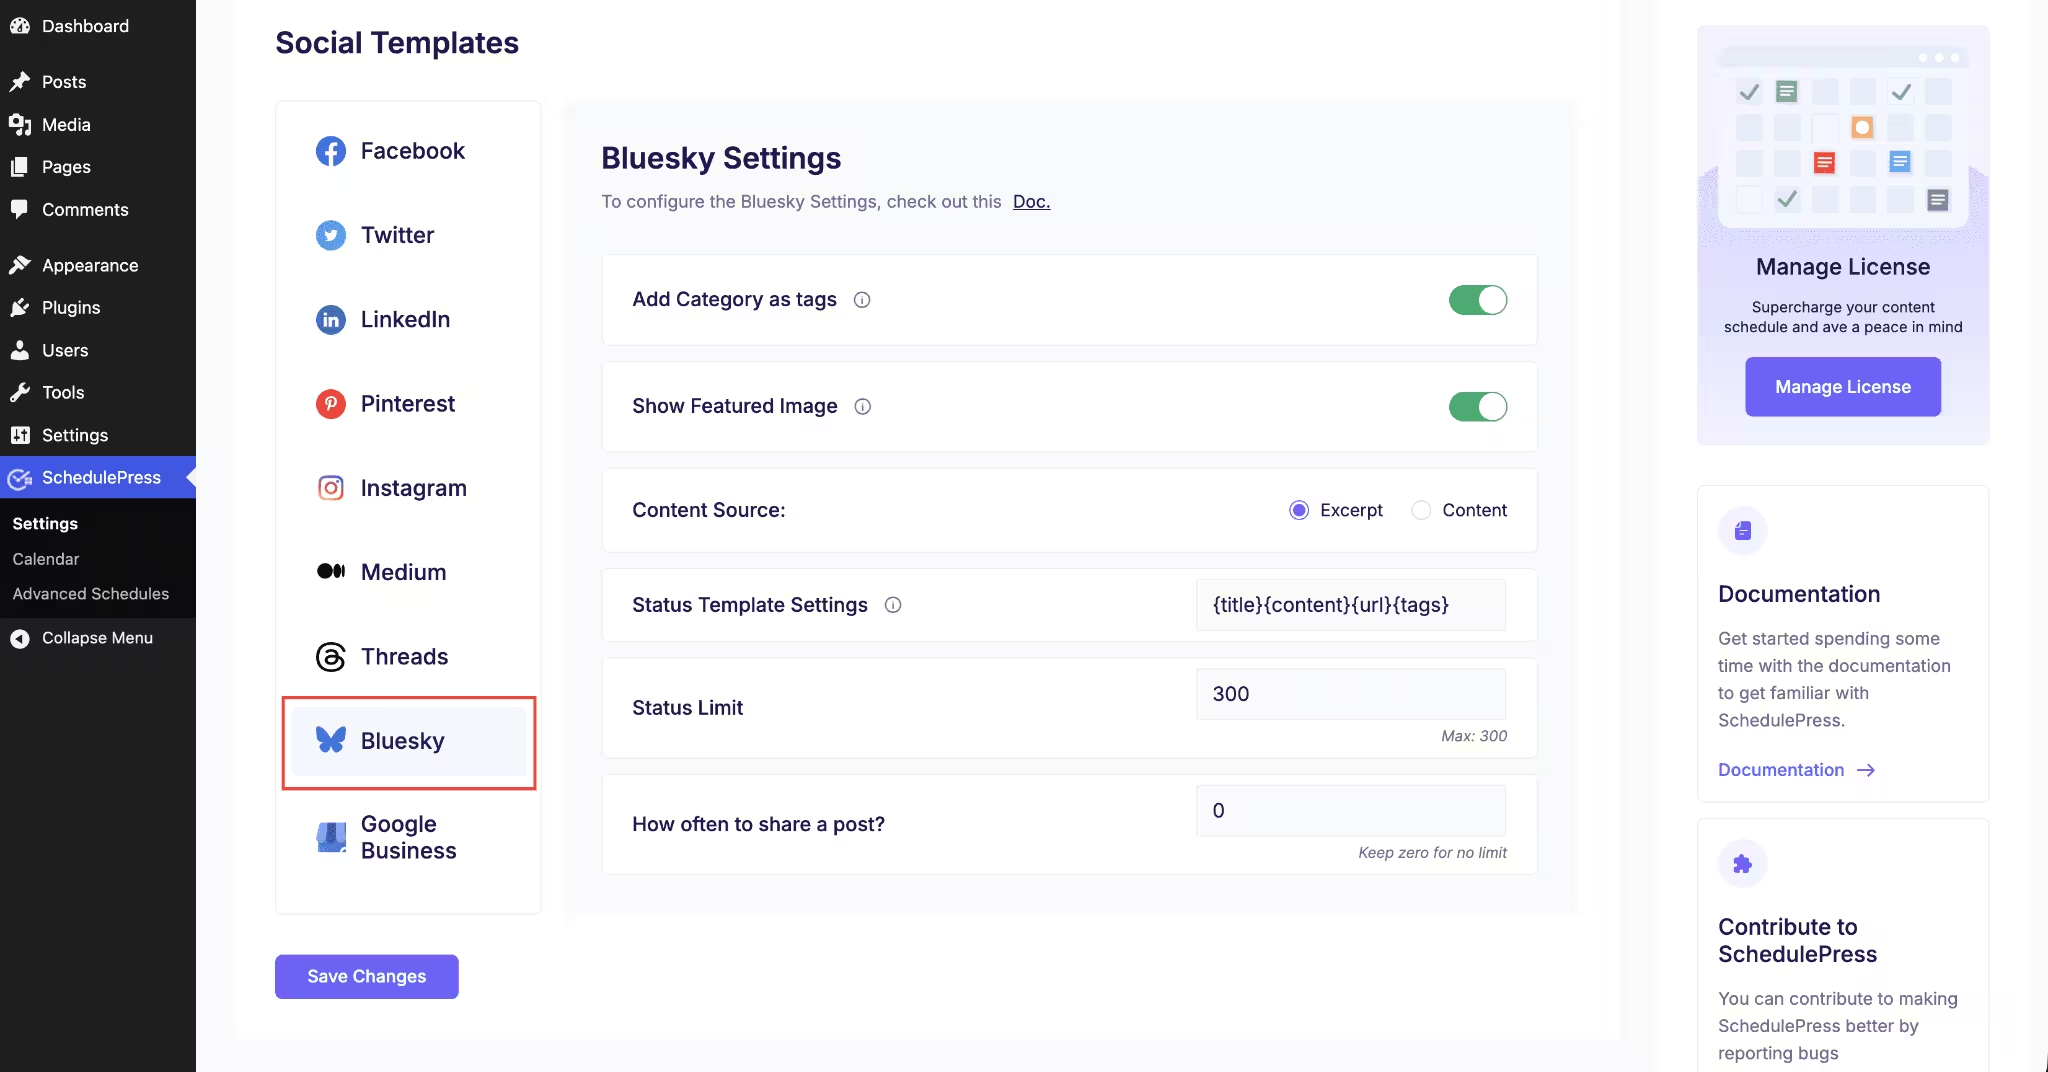
Use tokens such as {title}, {content}, {url}, and {tags} to control exactly what goes out with each post. Keep it concise as Bluesky allows only 300 characters per post, so a tight template ensures nothing gets cut off.
Step 6: Let It Auto-Post — Or Share Instantly
Now the payoff. When you schedule a WordPress post, SchedulePress shares it to your connected Bluesky profile automatically once it goes live.
Want it out right now? Open your post editor and expand the SchedulePress → Schedule And Share panel. Under Social Share Settings → Selected Social Platforms, choose Bluesky and your connected profile, then hit Share Now to publish instantly, no waiting for the scheduled time.
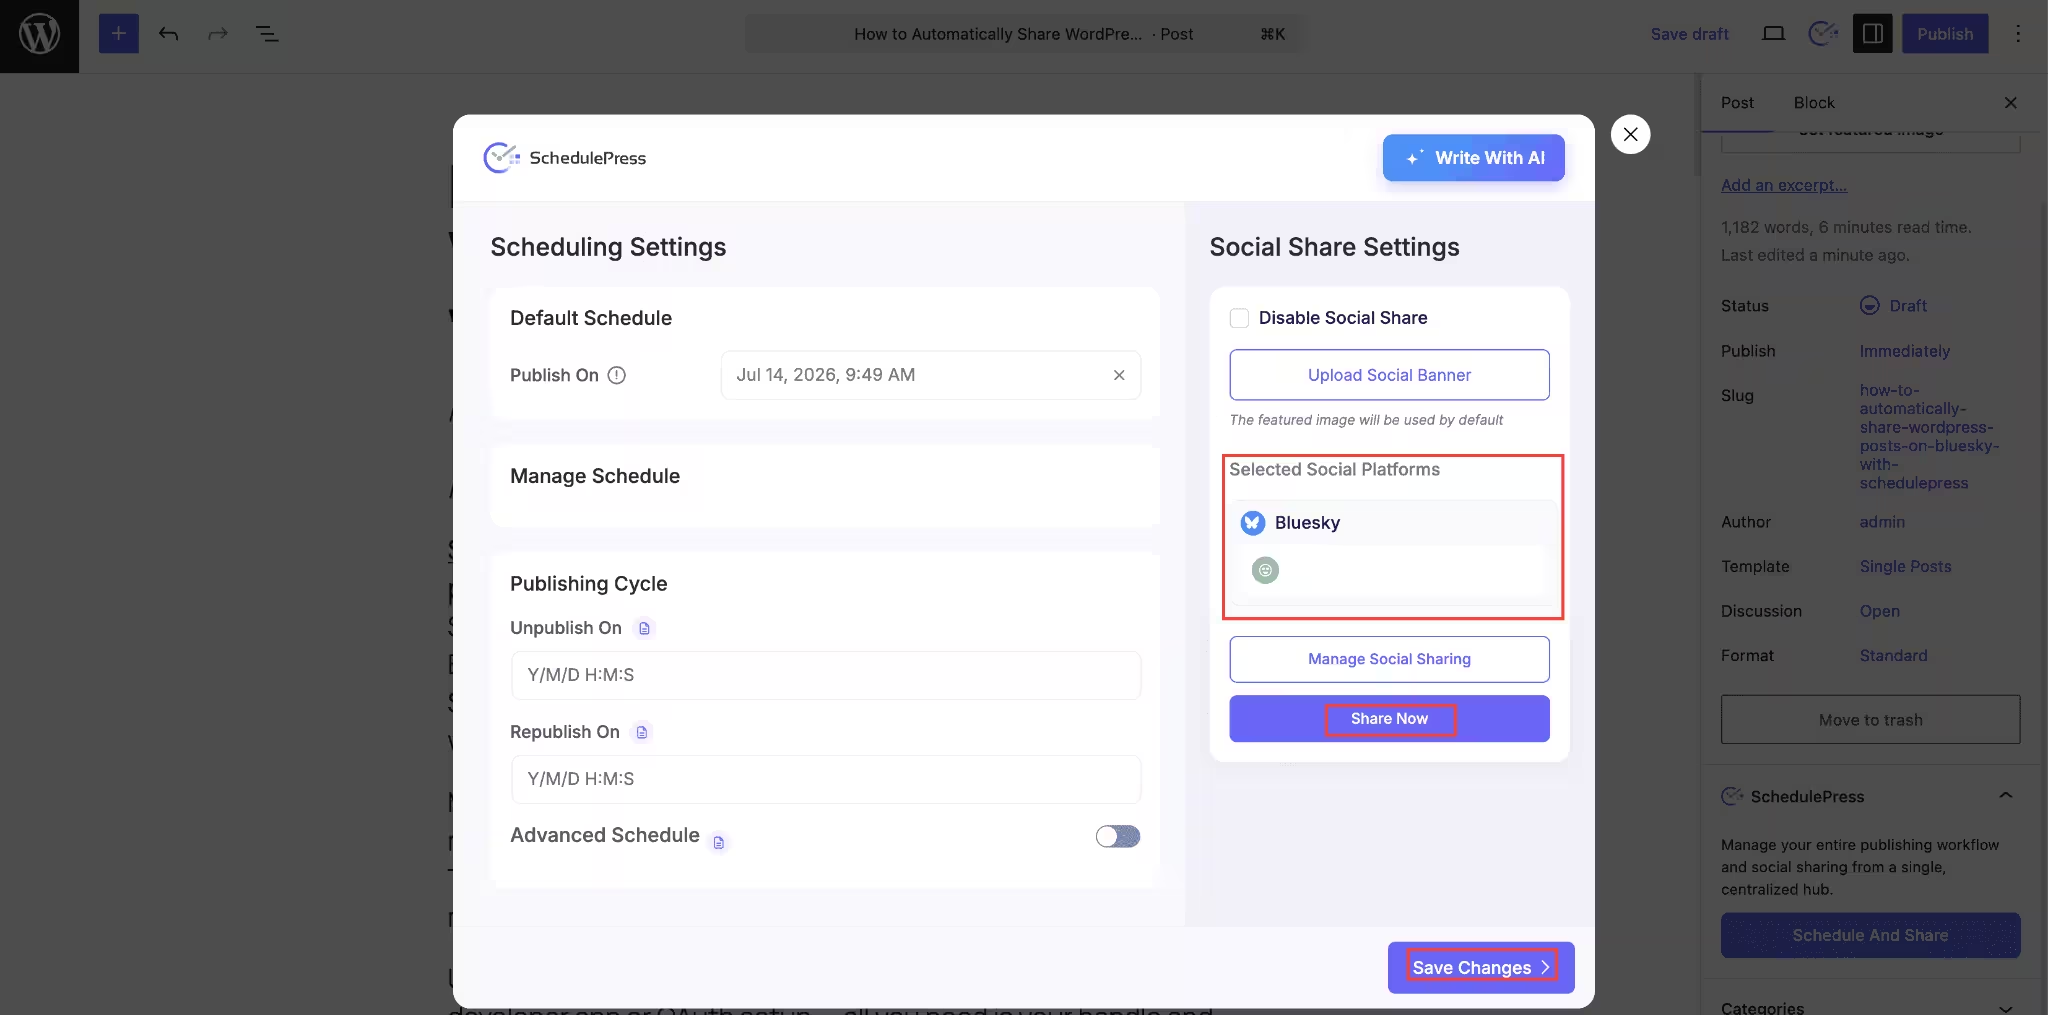
You can also click Manage Social Sharing and open the Bluesky tab to fine-tune the caption for this specific network. A live 300-character counter shows how much room you have left, alongside a real-time preview of exactly how the post will look on your Bluesky timeline before it goes out.
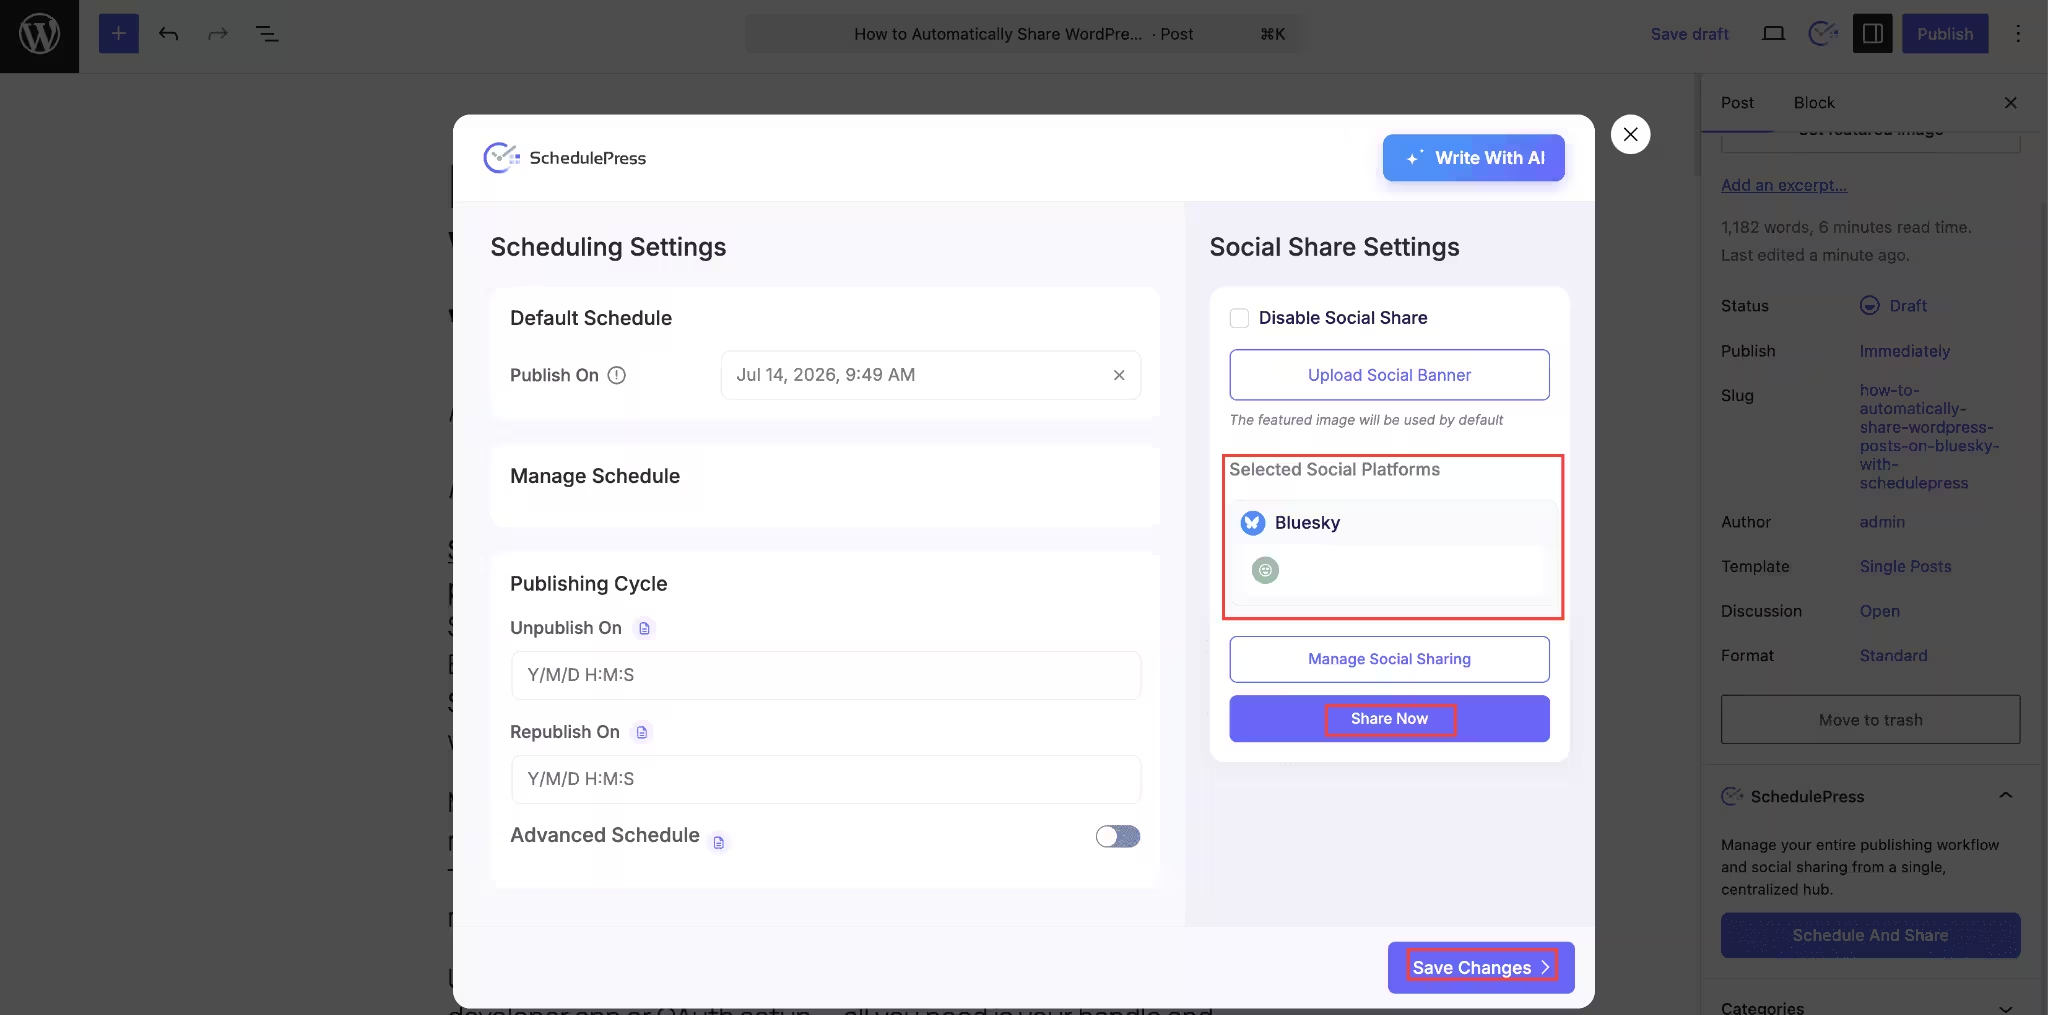
Click Update/Publish, and you are done.
Once everything is set, your scheduled WordPress posts publish to Bluesky the moment they go live with your chosen title, content, link, hashtags and featured image, plus a source link back to your site. No spreadsheets, no reminders, no manual copy-paste.
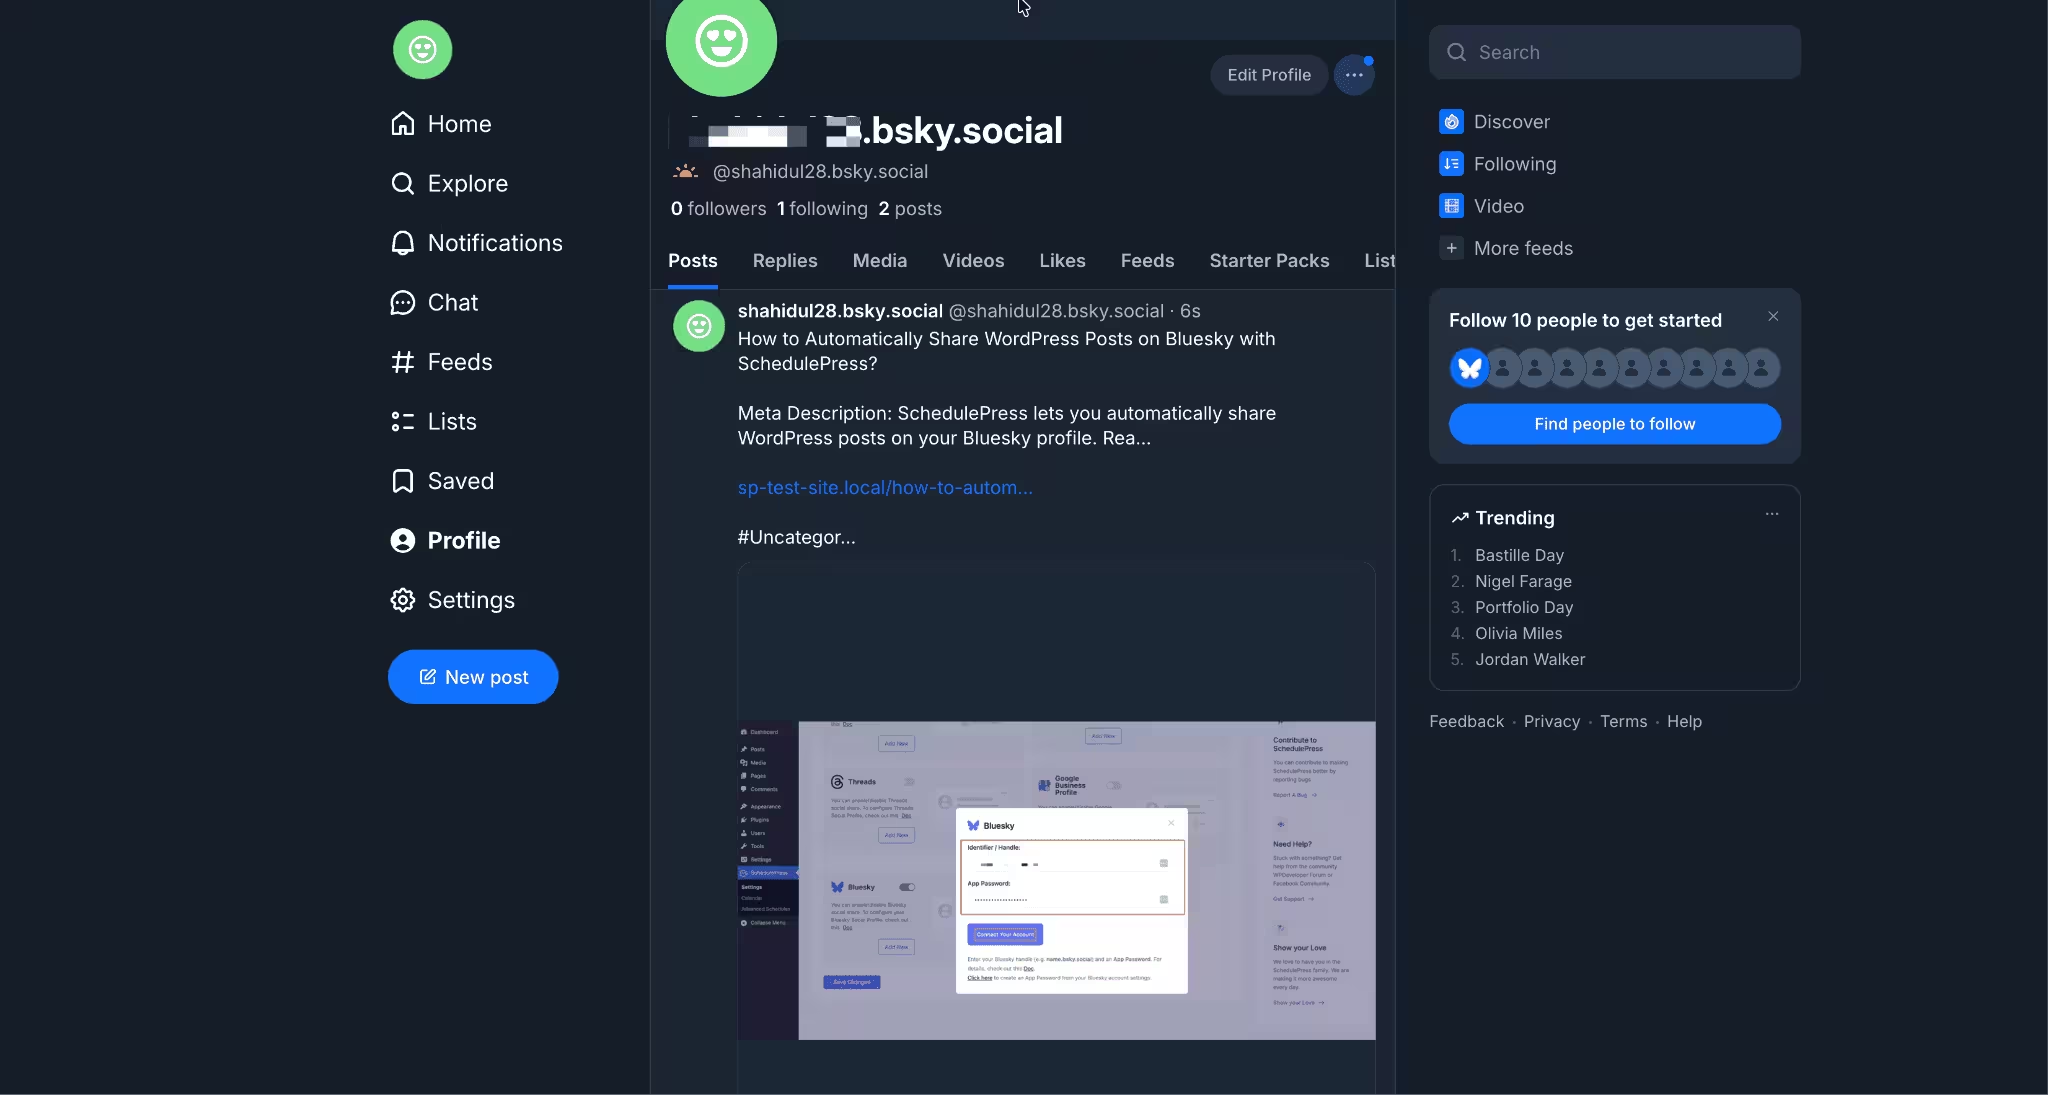
And because SchedulePress handles it directly inside WordPress, you are never juggling a separate scheduling tool to keep your Bluesky presence active.
Troubleshooting: Quick Fixes
A few issues you might run into, and how to solve them:
- “Authentication failed” / account will not connect: Confirm you used the full name.bsky.social handle and that the App Password was pasted without extra spaces. Still stuck? Regenerate a fresh App Password in Bluesky and try again.
- Post did not share: Check that both the network toggle and profile toggle are on, the post is not set to Disable Social Share, and Bluesky is selected under Manage Social Sharing.
- Sharing suddenly stopped: Your App Password may have been revoked in Bluesky. Delete the profile in SchedulePress and reconnect with a newly generated one.
- Text looks cut off: Bluesky caps posts at 300 characters. Shorten your template in the Social Templates tab.
Start Auto-Post WordPress to Bluesky with SchedulePress
Adding Bluesky to your WordPress workflow should not require developer skills or a third-party dashboard. With SchedulePress, it is a five-minute setup that keeps paying off with every post you publish.
Whether you are a solo blogger or managing multiple brands across several Bluesky accounts, SchedulePress turns social sharing into a set-it-and-forget-it part of your publishing routine.
Ready to automate? Get started with SchedulePress and connect your Bluesky profile today. Running into a snag? The dedicated support team is happy to help.